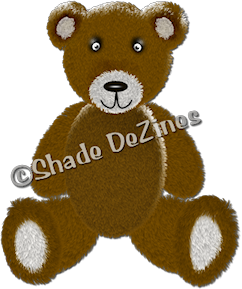
This is what we’re going to be making.
This tut assumes you are familiar with later versions of PSP and its tools.

This tutorial is meant as a teaching tool.
You May:Sell it in a kit, sig tag, birthday card etc, you may alter it, add to it, take away from it, do anything to it you'd like. A mention of my blog would be nice if asked about the bear, but is not necessary.
You may not:Sell it 'as is' for Commercial Use. You are not allowed to resell, sub-license or otherwise make available the graphic for use or distribution separately.
Meaning:
You may not place it anywhere for sale alone. It must always be a part of an existing kit, on a craft project that the bear is not the main design. I say this because it is my original idea and design. I reserve the right for it to be sold in that manner. It will always remain ©Shade DeZines. Thank you for abiding by my terms :)
Supplies Needed:
PSP / I’m using 12, but I’m sure any will work.
Eye Candy 5/Textures (Animal Fur) – Demo
Here
*Eye Candy 4000/Bevel Boss
*With the onset of the new Eye Candy collections, Alien Skin discontinued Eye Candy 4000. So, if you don’t have the newer collections you may need to play with Eye Candy 3 or PSP’s native bevel to achieve these effects. And you may have to use PSP's native Fur (Effects > Textures > Fur) in place of what I have used. You would need to find a suitable setting for this yourself however. Please note they make look different, but please don’t let that discourage you.
HINT: I personally advise naming your layers as you finish them when working on a tutorial that has this many layers. You’ll be glad you did!

Also, use the image’s often as a reference.
Let’s get started!
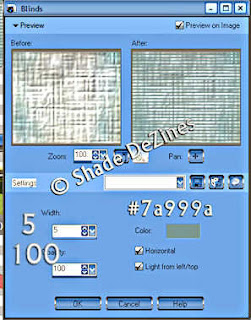
New Image / 1000 x 1100 / 300 ppi. > Fill: #7f5401 / Foreground: Null
1. Ellipse tool / Circle Setting > Create on vector. Draw out a circle for the head (approx. 336 x 336). Objects > Align > Horz. Center in canvas > Apply > Convert to Raster.
2. New Layer > Draw a small circle for the ears > Right click in circle > Edit Node > Move into place > Apply. Convert to Raster > Duplicate > Mirror. Merge Visible. SAVE.
3. New Layer > Ellipse tool set to ellipse > same settings. Draw a body shape approx. 325 x 473. Objects > Align > Horz. Center in canvas > Apply > Convert to Raster. DO NOT merge.
4. Ellipse tool > Same Settings. Draw a slightly imperfect circle using the ellipse for the feet at about 152 x 266. Adjust as needed > turn into place with Pick tool > Duplicate > Mirror. Convert to Raster.
5. Ellipse tool > Same Settings. Draw out a shape for the legs about 277 x 174. Move into place > Turn (If needed, adjust the size). When happy with placement convert to Raster. (Don’t worry about size of feet, they can be resized later, if needed). Move the leg layer below the body layer. Duplicate > Mirror.
6. Ellipse tool > Draw shape for the arms about 150 x 350. Adjust if needed. Turn until it looks about like it does in the image. Covert to Raster > Duplicate > Mirror > Arrange as needed. Note: I also moved the feet some.
7. Now it is time to work on the fur. You’ll need to adjust settings on some pieces to be sure the fur sticking out is on the right side. So let’s start with the head. I’ll give you my settings for that and let you do your own thing from there. Pattern: Original Image, Draw Outside Selection checked, Seed 2204 > Hairs: Starting @ Direction and moving down: 262, 12.95, 29, 161.46, 40, 74 > Lighting: 98, 81, 100, 100, White, 27. NOTE: If you don’t want the highlights, turn the brightness and highlight size to a lower number or Zero. Continue with all pieces except feet. Make any adjusts as needed.
8. Activate the right foot layer. Effects > Eye Candy 4000 > Bevel Boss / Basic: 40, 66, 91, 93 Checkmark in Shade > Lighting: 251, 86, 100, 25, Highlight: white / Shadow: #4c4646 > Bevel: Button > Apply fur to the foot > Adjust > Brightness/Contrast 8/0 > Adjust > Brightness and Contrast > Clarify: 1.0 > Duplicate > Mirror.
**I know. It was just for placement and you can delete the original left foot now

DO NOT MERGE ANYTHING YET
9. Move Head above body layer. Change your color to #d8d6d3. Grab the ellipse tool and make a shape for the inner ear > Turn it and move it into place > Duplicate > Mirror > Move into place if needed > Apply fur > Apply fur again, changing hair direction (Optional). If it’s too dark lighten a bit. You could also Duplicate and Merge Down which will make it lighter too. If you would like to shade behind the ears like I did, do so now. I used the Lighten/Darken Tool – shade just like you would on a ribbon.
10. Ellipse tool > Draw out a shape for the outer mouth area about 155 x 119 using the same color as the inner ear: Adjust brightness if needed > Apply fur > Move into place dropping shape just slightly below the head line.
11. Color: Black > Ellipse tool > Draw a nose > Apply Bevel. My settings: Basic: 40.66, 67, 91. Lighting: 251, 86, 100, 100, white/black. Bevel: Carve.
12. Pen tool / Create on Vector, Solid Line, Width 8, Anti-Alias checked. Draw the mouth lines. Apply a small bevel and a very light drop shadow just to give it a bit of depth.
13. Ellipse tool > Color: Black > Draw an ellipse for the eyes. Move into place > turn as needed > Covert to Raster > Duplicate > Mirror.
14. Ellipse tool > Draw inner eye, color same as outer mouth area or white if preferred, convert to raster. Move into position if needed. Draw a black circle for pupil > Convert to Raster > Select All > Float > Defloat > Artistic Effects: Balls & Bubbles / Shape: Single ball / Surface: white, 22, 35, 98 / Illumination: Max 61, Min 6, Lights 1, Position lower right bottom, color white, highlight 63, Bubble light checked >Merge Down with White layer > Resize the outer black layer 90% > Select the black layer > Balls & Bubbles > Change only the Illumination settings to: Ambiance: 21,0 / Position: top left corner, highlight size: 44 > Deselect. Still on same layer > Effects > Texture Effects > Fine Leather: Color dcdcdc, Angle: 129, 35, 241, 75, 3 > Lower opacity of white layer some so it blends better with the back layer > Merge all left eye layers > Duplicate > Mirror. (Again, delete the unused black eye layer *smiles*).
Wow … you should have a bear now!! Way to go! Before we merge anything we may need to do some adjusting. Look over your bear. Are you happy with the way it looks? Are the legs and arms in the right place?? Need to add any more shading, an extra layer of fur, resize anything? Make your adjustments, or add embellishments now. When you are finished merge visible and save as PNG.
Congratulations – You’re finished!!
Thank you for doing my tutorial.
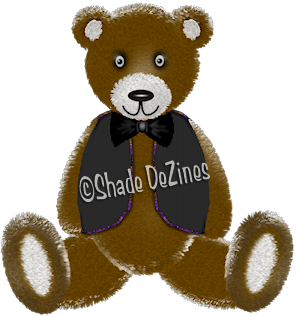
Here is my before and after shot from any needed adjustments & embellishing.


 Also, use the image’s often as a reference.


