Showing posts with label Tutorials. Show all posts

Mar 8, 2009

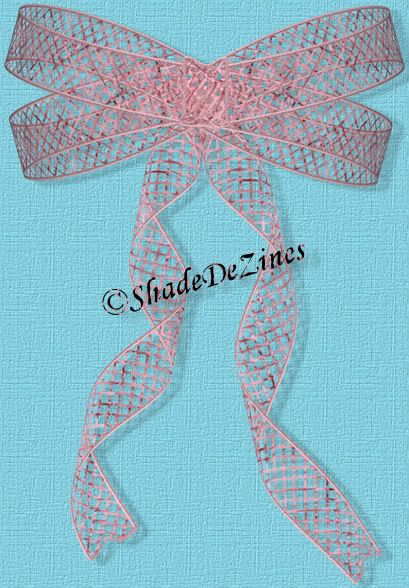
Mesh Bow Tutorial

This is a tutorial I just finished for DSC members and posted on the DSC Designers Blog.
If you would like to try it too, please head over to our blog: DSC DESIGNERS.
Let me know if you enjoy my tut. I may write more ;)

Nov 18, 2008

Adding Download Links To Your Blogs

I am sure there are other ways to do this, but this is how I do it.
What you need:
1. A blog (tee-hee) For this example we are using http://blogger.com.
2. A storage site (such as 4Shared for this example)
3. A preview of the creation you're offering and ready to go
4. Your creation zipped and ready to go (don't forget to add your Terms of Use (TOU))
* I recommend you add your TOU to each and every file you offer.
Now you should be good to go so let's begin.

Go log into your 4Shared account and upload your zipped file. To do that, click on the Browse button as shown below. Navigate to the location of your zipped folder, click on it and then click Open. Now click Upload.

Photobucket

Once that has uploaded you will see this:

Photobucket


Now you need to Copy the link above that’s in the box. You could use HTML Tags etc, but that is not what I am teaching in this lesson. This is a simple way to me, no fuss – no muss. You should copy that to a notepad if you don’t already have your blog open, in case you need it again because of a mistake. This prevents going back and forth between 4Shared and your blog, and just saves time.


Ok, if you don’t have your blog open, do so now please. Once you are signed into your blog and on your dashboard click on New Post. You will see the next preview, without the Add image part of this preview; we’ll come back to that shortly. Take a few moments to look over this window (on the blog) and familiarize yourself with the tabs and buttons.


Where I typed in the number 1 it says Title. That is where you type in the name of your creation. You can see on my preview I typed "Alpha Ornament". That is the file I just uploaded, plus it did double duty for this tut :)


Now we need to add our Preview. Click the icon that looks like a mountain. It is the insert picture button. You can see it in the preview. Clicking it opens the second (top) section of this preview. If you want it centered tic Center before doing anything else. The size you will need to determine based on your preview size and your column width. You can play with that if it isn’t right. Just start with Medium first.


If you want to upload from your computer as I have done click the Browse tab and locate the Preview you have ready. If you plan to use Photobucket or something similar you will need to have the HTML code to put in the URL box. For the sake of this tut, let’s say it is Photobucket. You need to copy the "Direct Link" code and paste it into the URL box. Either way, when you have done so, click the Upload Image button. Please Note: I had to use Photobucket's HTML code to add my images here but not for my image used for my previews, odd. So it may be different for different things. If all else fails, try one at a time and then click Preview (under Compose tab) and you'll see if it workd.

Photobucket


Now you are back to the Posting window and you probably have a bunch of code in there and are going "what the heck"? Don’t panic, just click the Compose tab and you will see the actual image if it isn’t showing already. The Preview link under the tabs will let you get a "plain" view of what it will look like on your blog.


Drop down a line (tap Enter on your keyboard), type your message, as much as you want. When you are finished drop down 2 lines only (keeps a wide space from being in your presentation) and type out the word Download.


Here you have a couple options. You can use the word Download for your link or you can just use 4Shared. Or you can do like I did (since I use both 4Shared and Rapidshare) and type Download then drop down and type 4Shared. I think you’ll get the idea shortly. You can even use an image for your download link once you get comfortable with what you’re doing.


Ok, back to the way I am doing it here. I typed Download, dropped a line, and typed 4Shared. Look at next preview if you need a visual. As you can see, I’ve typed my message about the freebie I am offering. I’ve typed Downloads, dropped another line and typed 4Shared.


Highlight the word 4Shared, nothing else. Go up to the icon showing the link with the globe behind it and click on it. Its #2 in the above preview and you’ll see a close-up below.

Photobucket


I almost forgot to tell you that the "Labels for this post" section above is for quick searching if you have added the Label widget to your page. I typed freebies and it will show in the freebies link if someone clicks it from my main page.


Copy the link you saved from 4Shared and Paste it into this box that pops up and click OK.

Photobucket


You can now click the Preview tab to see how everything looks. Hold your mouse over the link to show the complete address for the link you just made (without clicking it).


Now click Hide Preview Link.


If you are satisfied with everything click **"Publish Post".


** DO NOT click Save Post!! It will close your post and save it as a draft. I found out the hard way, and it messed up my formatting for some reason. Your post will auto save every few minutes. I would imagine you can do a draft however, if you want to work on a post for a few days :)


If you find you need to edit something click Customize (from main blog window), then click the Edit Posts tab, and finally the Edit link on the post you were working on and correct anything you need to. Now, be sure to SAVE this time, using the Save button!!


There you have it …you have just set up your first download offer for your scrap blog! Congratulations!!


I hope I didn’t make this too complicated for you!


Debb/Shade DeZines


Tutorial © Shade DeZines 2008 Do NOT claim as your own!
Do not host or upload this tutorial without my express, written permission. You MAY print it for personal use. Otherwise send people to my blog to learn from it.
Thank You
Aug 27, 2008

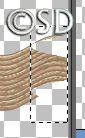
Rick Rack (PSP)

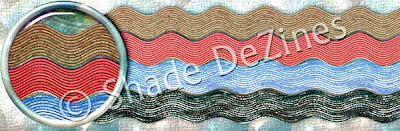
Okay ... Here's what it looks like.


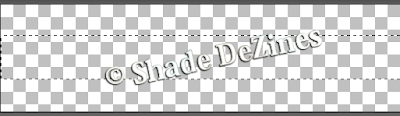
1. Open a New Image 3600 x 350 / 300 ppi / Transparent

2. With your Selection Tool draw out a rectangle aprox. 55 pixels wide and the length of the canvas.

3. Flood Fill with a pattern or gradient of your choice.
* Make note of a darker complementing color in your pattern for using later. Copy it's HTML code or write it down.

4. Apply a texture of your choice or, use mine: Effects > Texture Effects > Texture/Canvas Coarse: Size (in order): 203, 0, 1, 0, o, 315, 50, 30.

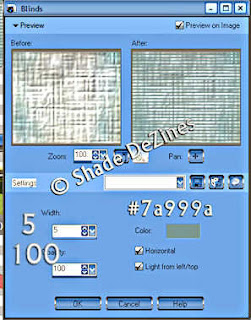
5. Effects > Texture Effects > Blinds.
This is where you add the HTML # you saved.
Mine was for a green ribbon, sorry it doesn't match lol.

6. Select None.

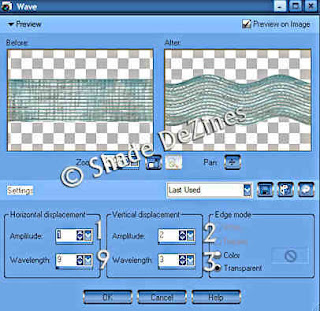
7. Effects > Distortion Effects > Wave.

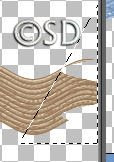
8. Using your selection marquee set to rectangle surround the rough ends and hit Delete.

Or, use the the freehand selection tool if you want a diagonal cut.

Save as .PNG for use in your layouts.

This is not to be made into a script. It is not to be sold. It is for your PERSONAL USE only.

Aug 2, 2008

Fuzzy Teddy Bear Tutorial


This is what we’re going to be making.

This tut assumes you are familiar with later versions of PSP and its tools.

This tutorial is meant as a teaching tool.
You May:Sell it in a kit, sig tag, birthday card etc, you may alter it, add to it, take away from it, do anything to it you'd like. A mention of my blog would be nice if asked about the bear, but is not necessary.


You may not:Sell it 'as is' for Commercial Use. You are not allowed to resell, sub-license or otherwise make available the graphic for use or distribution separately.
Meaning:
You may not place it anywhere for sale alone. It must always be a part of an existing kit, on a craft project that the bear is not the main design. I say this because it is my original idea and design. I reserve the right for it to be sold in that manner. It will always remain ©Shade DeZines. Thank you for abiding by my terms :)

Supplies Needed:
PSP / I’m using 12, but I’m sure any will work.
Eye Candy 5/Textures (Animal Fur) – Demo Here
*Eye Candy 4000/Bevel Boss
*With the onset of the new Eye Candy collections, Alien Skin discontinued Eye Candy 4000. So, if you don’t have the newer collections you may need to play with Eye Candy 3 or PSP’s native bevel to achieve these effects. And you may have to use PSP's native Fur (Effects > Textures > Fur) in place of what I have used. You would need to find a suitable setting for this yourself however. Please note they make look different, but please don’t let that discourage you.

HINT: I personally advise naming your layers as you finish them when working on a tutorial that has this many layers. You’ll be glad you did! Also, use the image’s often as a reference.

Let’s get started!

New Image / 1000 x 1100 / 300 ppi. > Fill: #7f5401 / Foreground: Null

1. Ellipse tool / Circle Setting > Create on vector. Draw out a circle for the head (approx. 336 x 336). Objects > Align > Horz. Center in canvas > Apply > Convert to Raster.

2. New Layer > Draw a small circle for the ears > Right click in circle > Edit Node > Move into place > Apply. Convert to Raster > Duplicate > Mirror. Merge Visible. SAVE.

3. New Layer > Ellipse tool set to ellipse > same settings. Draw a body shape approx. 325 x 473. Objects > Align > Horz. Center in canvas > Apply > Convert to Raster. DO NOT merge.

4. Ellipse tool > Same Settings. Draw a slightly imperfect circle using the ellipse for the feet at about 152 x 266. Adjust as needed > turn into place with Pick tool > Duplicate > Mirror. Convert to Raster.

5. Ellipse tool > Same Settings. Draw out a shape for the legs about 277 x 174. Move into place > Turn (If needed, adjust the size). When happy with placement convert to Raster. (Don’t worry about size of feet, they can be resized later, if needed). Move the leg layer below the body layer. Duplicate > Mirror.

6. Ellipse tool > Draw shape for the arms about 150 x 350. Adjust if needed. Turn until it looks about like it does in the image. Covert to Raster > Duplicate > Mirror > Arrange as needed. Note: I also moved the feet some.

7. Now it is time to work on the fur. You’ll need to adjust settings on some pieces to be sure the fur sticking out is on the right side. So let’s start with the head. I’ll give you my settings for that and let you do your own thing from there. Pattern: Original Image, Draw Outside Selection checked, Seed 2204 > Hairs: Starting @ Direction and moving down: 262, 12.95, 29, 161.46, 40, 74 > Lighting: 98, 81, 100, 100, White, 27. NOTE: If you don’t want the highlights, turn the brightness and highlight size to a lower number or Zero. Continue with all pieces except feet. Make any adjusts as needed.

8. Activate the right foot layer. Effects > Eye Candy 4000 > Bevel Boss / Basic: 40, 66, 91, 93 Checkmark in Shade > Lighting: 251, 86, 100, 25, Highlight: white / Shadow: #4c4646 > Bevel: Button > Apply fur to the foot > Adjust > Brightness/Contrast 8/0 > Adjust > Brightness and Contrast > Clarify: 1.0 > Duplicate > Mirror.

**I know. It was just for placement and you can delete the original left foot now

DO NOT MERGE ANYTHING YET

9. Move Head above body layer. Change your color to #d8d6d3. Grab the ellipse tool and make a shape for the inner ear > Turn it and move it into place > Duplicate > Mirror > Move into place if needed > Apply fur > Apply fur again, changing hair direction (Optional). If it’s too dark lighten a bit. You could also Duplicate and Merge Down which will make it lighter too. If you would like to shade behind the ears like I did, do so now. I used the Lighten/Darken Tool – shade just like you would on a ribbon.

10. Ellipse tool > Draw out a shape for the outer mouth area about 155 x 119 using the same color as the inner ear: Adjust brightness if needed > Apply fur > Move into place dropping shape just slightly below the head line.

11. Color: Black > Ellipse tool > Draw a nose > Apply Bevel. My settings: Basic: 40.66, 67, 91. Lighting: 251, 86, 100, 100, white/black. Bevel: Carve.

12. Pen tool / Create on Vector, Solid Line, Width 8, Anti-Alias checked. Draw the mouth lines. Apply a small bevel and a very light drop shadow just to give it a bit of depth.

13. Ellipse tool > Color: Black > Draw an ellipse for the eyes. Move into place > turn as needed > Covert to Raster > Duplicate > Mirror.

14. Ellipse tool > Draw inner eye, color same as outer mouth area or white if preferred, convert to raster. Move into position if needed. Draw a black circle for pupil > Convert to Raster > Select All > Float > Defloat > Artistic Effects: Balls & Bubbles / Shape: Single ball / Surface: white, 22, 35, 98 / Illumination: Max 61, Min 6, Lights 1, Position lower right bottom, color white, highlight 63, Bubble light checked >Merge Down with White layer > Resize the outer black layer 90% > Select the black layer > Balls & Bubbles > Change only the Illumination settings to: Ambiance: 21,0 / Position: top left corner, highlight size: 44 > Deselect. Still on same layer > Effects > Texture Effects > Fine Leather: Color dcdcdc, Angle: 129, 35, 241, 75, 3 > Lower opacity of white layer some so it blends better with the back layer > Merge all left eye layers > Duplicate > Mirror. (Again, delete the unused black eye layer *smiles*).

Wow … you should have a bear now!! Way to go! Before we merge anything we may need to do some adjusting. Look over your bear. Are you happy with the way it looks? Are the legs and arms in the right place?? Need to add any more shading, an extra layer of fur, resize anything? Make your adjustments, or add embellishments now. When you are finished merge visible and save as PNG.

Congratulations – You’re finished!!

Thank you for doing my tutorial.

Here is my before and after shot from any needed adjustments & embellishing.